Start Blogging Guide Part II – WordPress Tips and Website Themes
 If you’ve followed step by step so far, you’ve gone through the exercises to coming up with a blog name you love and setting up a blog with your own domain name. So far I’ve taken you through posting your first blog post using WordPress. In this part I’ll give you some WordPress tips and show how you can easily change the design of your blog with a few clicks.
Basic WordPress Settings and Tips Tutorial
Settings
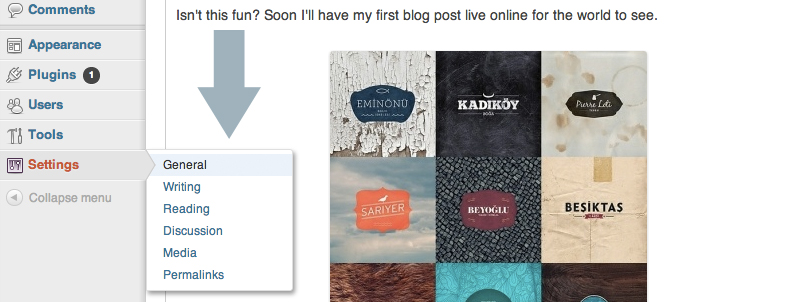
On the left hand side you’ll see the menu tab for “Settings”. Hover over it and you’ll see a pop out menu. Click on “General”
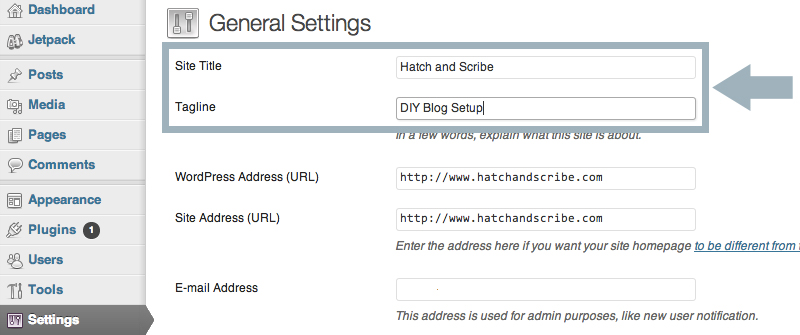
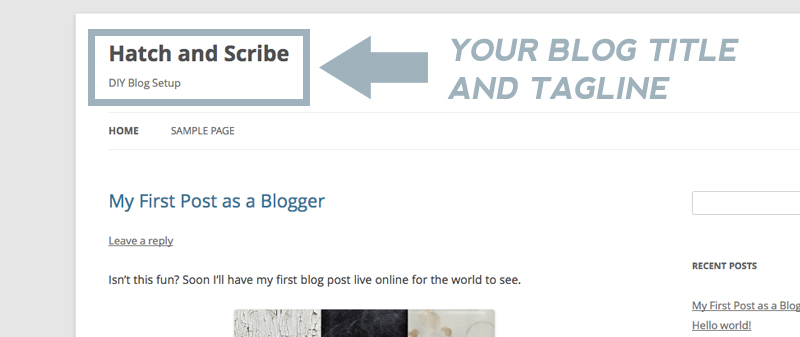
- General: In this section you can change the “title” of your blog and the blog’s “tagline” – then click on “Save Changes”. (In the next article, I’ll show you how to make your own custom header image)
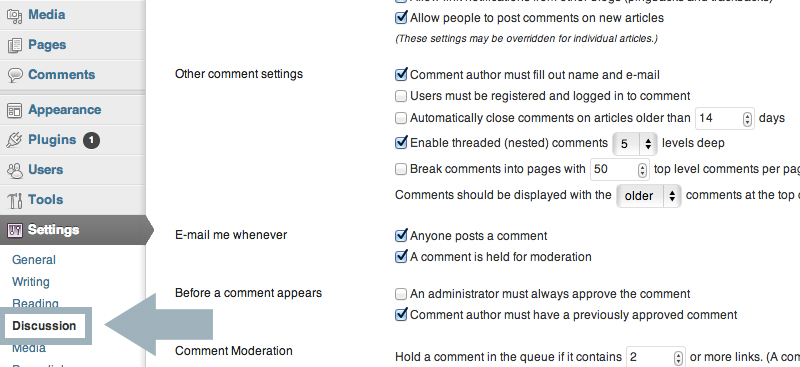
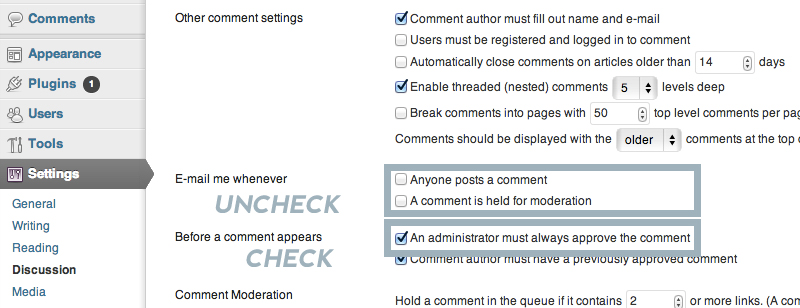
- Discussion: Under the “Settings” menu tab, click on “Discussion”. Here you’ll want to change a few things. Here I uncheck email me whenever “Anyone posts a comment” and “A comment is held for moderation.” I will then check the box that says “An administrator must always approve the comment” – this makes sure no spam gets posted onto your blog posts. Then click on the “Save Changes” button at the bottom
- Permalinks: This time under the “Settings” menu tab click on “Permalinks”
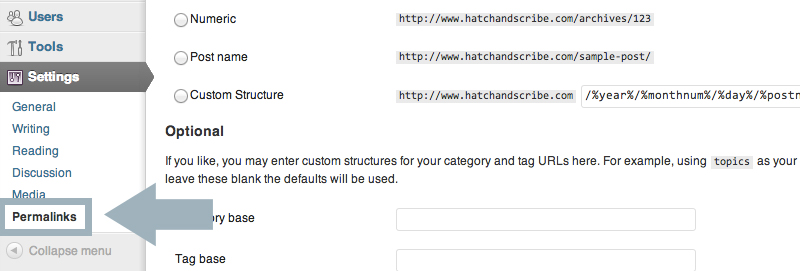
Select the “Custom Structure” box. Then type in /%post_id%/%postname%/ and click “Save Changes”
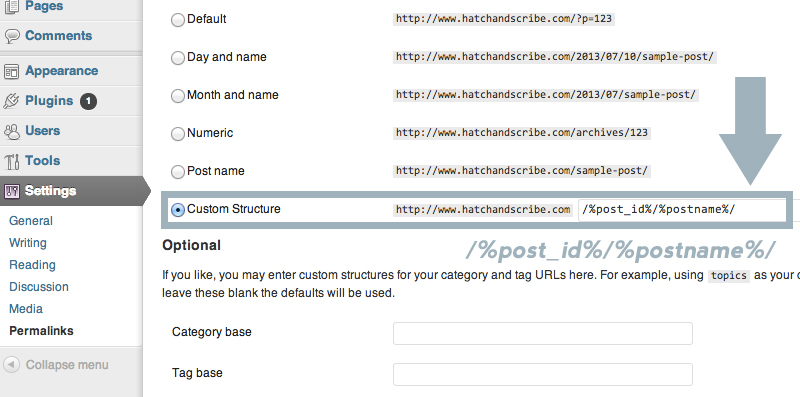
What this does is change the way your blog posts urls are created. Before it would have been the date. But this isn’t good, because you want your posts to be timeless. After making the changes above, the url of your posts become a number id and the title of the post

Widgets
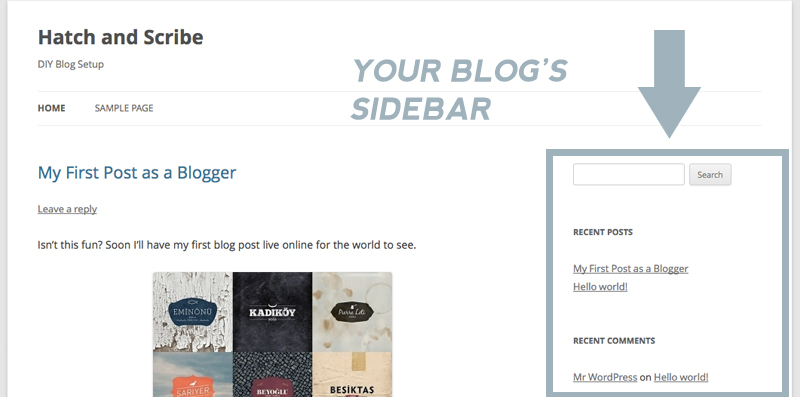
If you visit your site, on the right hand side there are a number of different sections like “recent posts” and “recent comments”. This is called your sidebar. You can find this by hovering over the “Appearance” menu tab on the left hand side of your WordPress area and clicking on “Widgets”

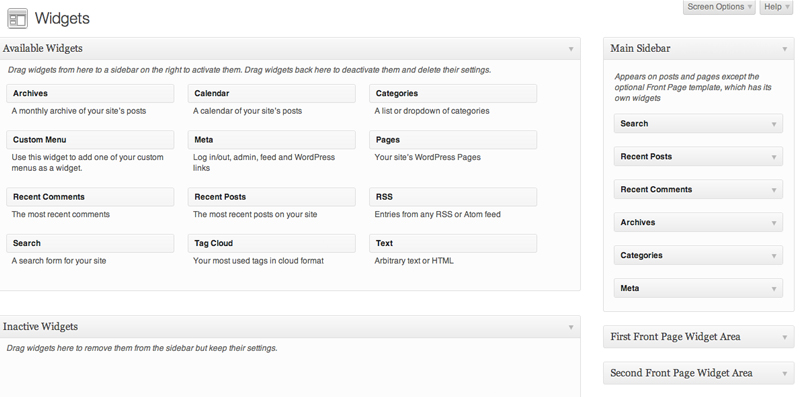
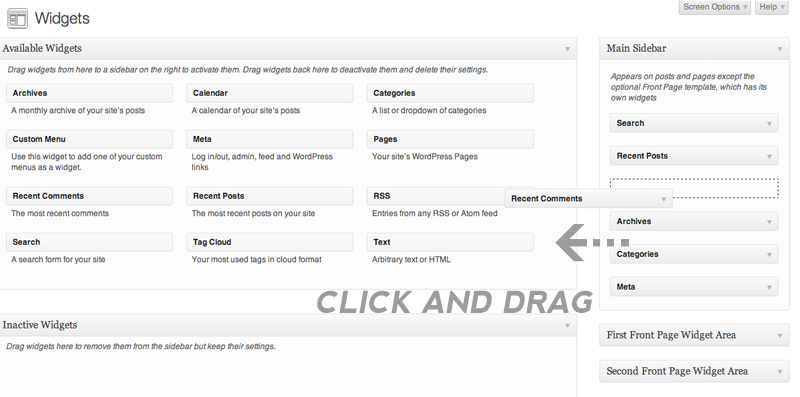
I usually clean up this section by getting rid of a few items. I’m getting rid of “Recent Comments”, “Archives”, and “Meta”. To get rid of items, just click on the tab and drag it over to the left
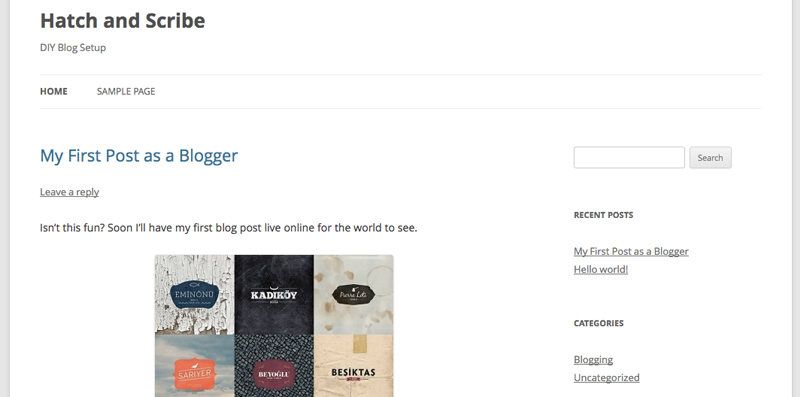
Now the sidebar looks a lot cleaner
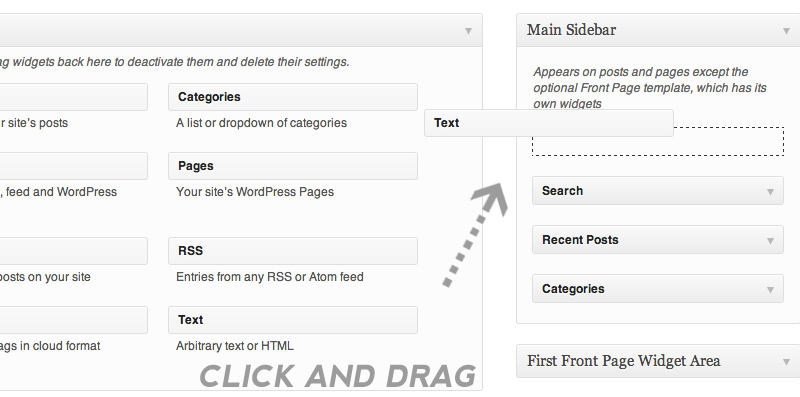
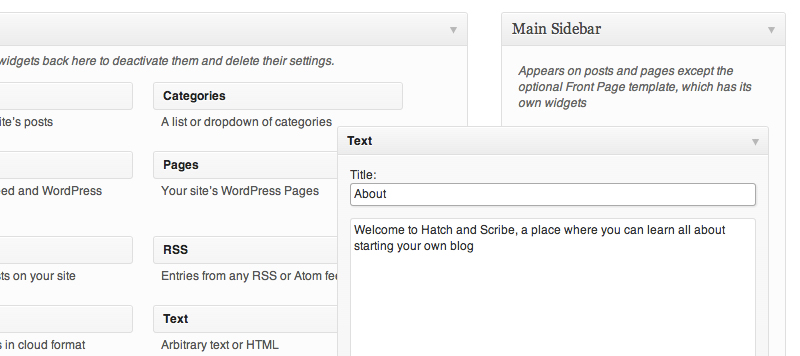
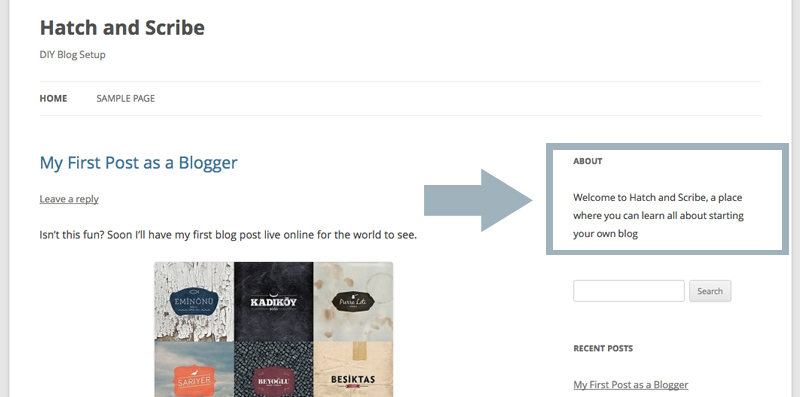
You can add a sidebar item by clicking on one of the Available Widgets on the left side and dragging it over to the right. I’ve just added a text widget, and wrote a little ‘About’ section for the site, which will show up in the sidebar. Click save and it shows up on your blog
Clean Up
Let’s get rid of that other post that shows up under the “Recent Posts” sidebar section on your site.
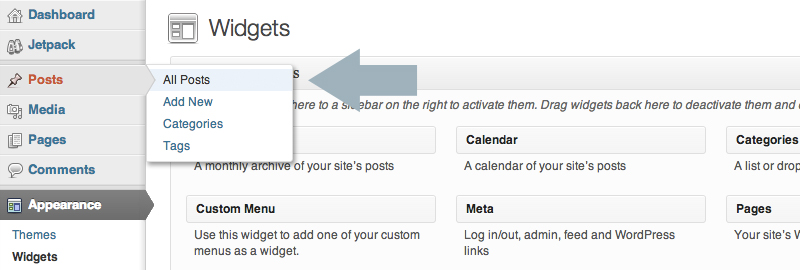
Hover over “Posts” and click on “All Posts”. Here you can see all of the posts you have on your site.
If you hover over the “Hello World!” text you’ll see some options pop up under it. Click on “Trash” to delete it
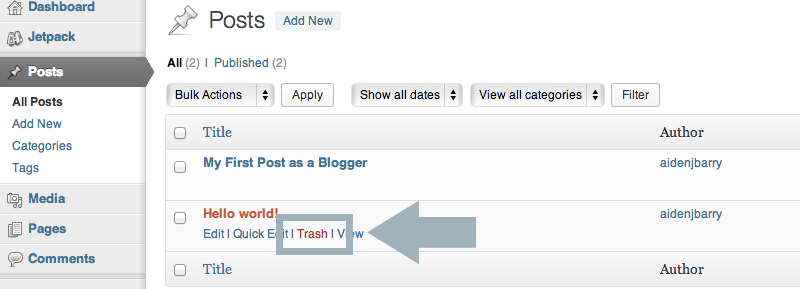
Now hover over the “Pages” tab and click on “All Pages”. Do the same here – hover over the “Sample Page” text, and click on “Trash” to get rid of it
WordPress Themes
Themes let you change the whole look of your blog without having to do any coding work yourself. If you think the current look of your blog looks a bit too simple here is how you can change it.
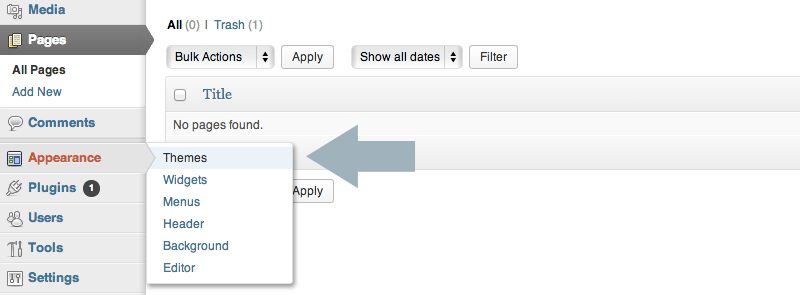
We can easily change the look of the WordPress website design by using a different theme. So hover over the “Appearance” menu tab and click on “Themes”
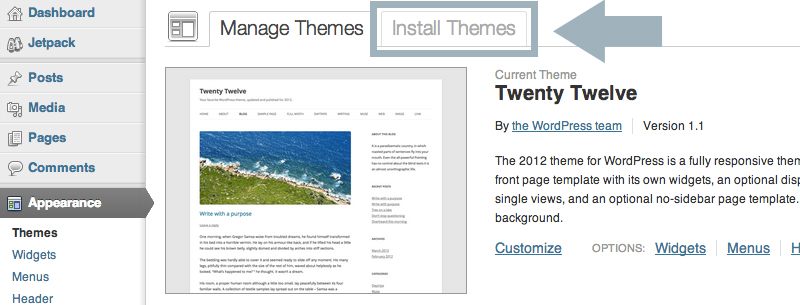
Go ahead and click on the “Install Themes” tab at the top.
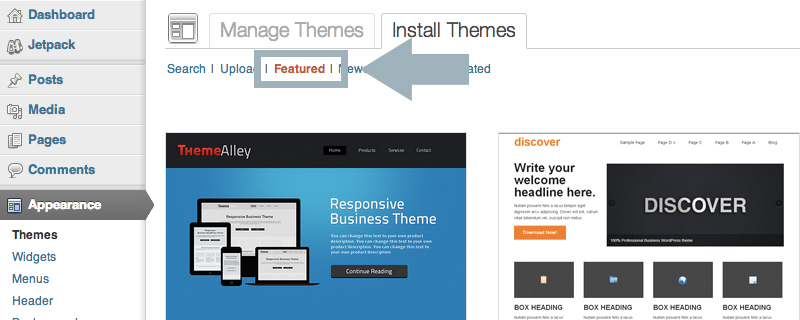
Here you can search for a different and more colourful theme. I just clicked on the “Featured” tab at the top to find the best ones
You can click on the “Preview” buttons to see how the theme looks. When you have found a theme you like, click on the “Install Now” button underneath it
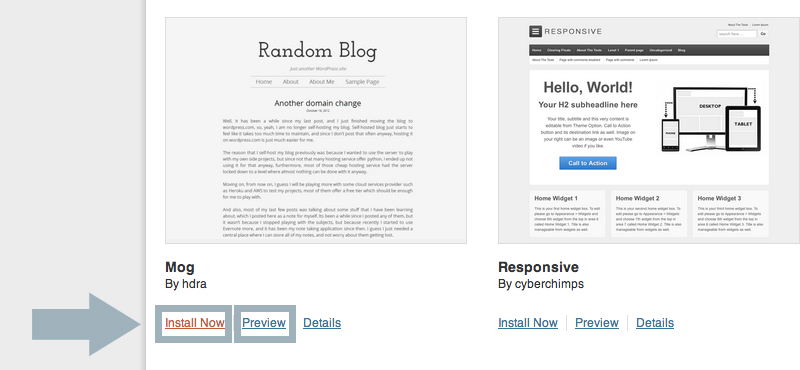
Then on the next page click on “Activate”

And now you have a whole new look for your site with just one click of a button
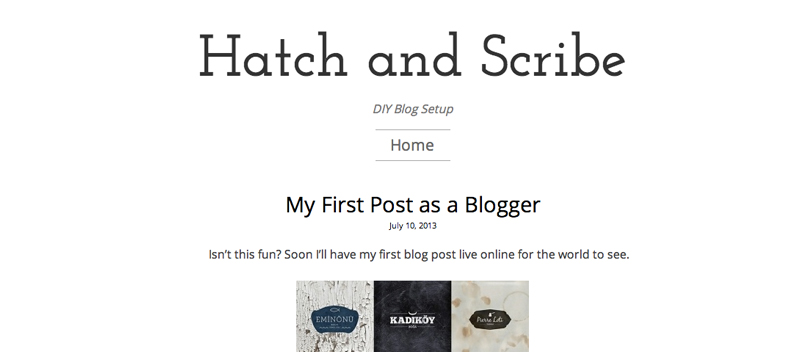
Or how about…
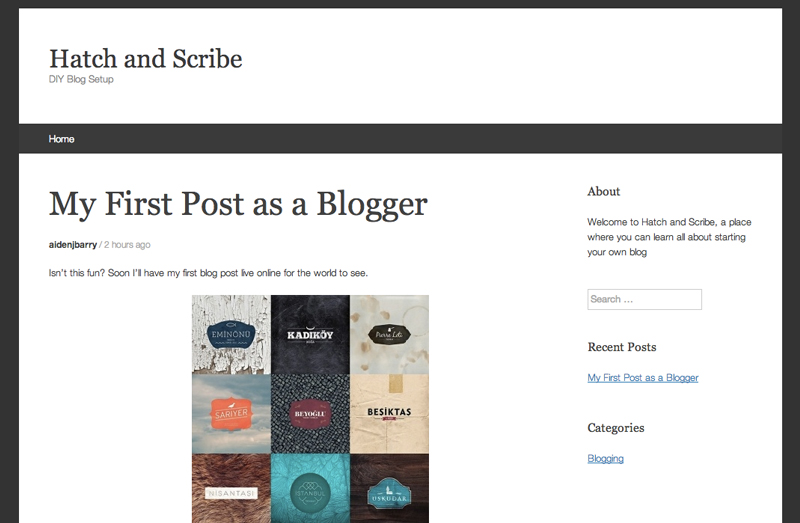
These themes are all free, but you can find Premium looking themes at WooThemes and other places (I use WooThemes). Be careful of using free themes from other websites as there are some naughty people who will put code in the theme that lets them hack into your site.
Next up I’ll show you how to design your own DIY header for your blog. This is important as it really shows people visiting your blog who you are, your style, and what your blog is about.


 (A photo of me leaving the Philippines, after Volunteering there for a year and half. While my home design blog was still running.)

